Tomorrow is always fresh with no mistakes in it...yet.
Showing posts with label The Winter's Tale. Show all posts

Saturday, February 11, 2012

I Can Explain

I know, I know: I haven't posted on here for approximately an age. In my defense, though, I've been doing a whole lot of everything else. (See my previous posts.)
But hey, the play's over! Hard to believe and I don't know what I'm going to do with all my extra time now, but yes, it's done. Closed. Finished. And it was amazing, it really was. I know it sounds like I'm tooting my own horn, but I was honestly so blessed to be a member of such an incredible cast and crew and to be able to tell this fabulous story. If you haven't seen it or read it, please do. You'll love it.
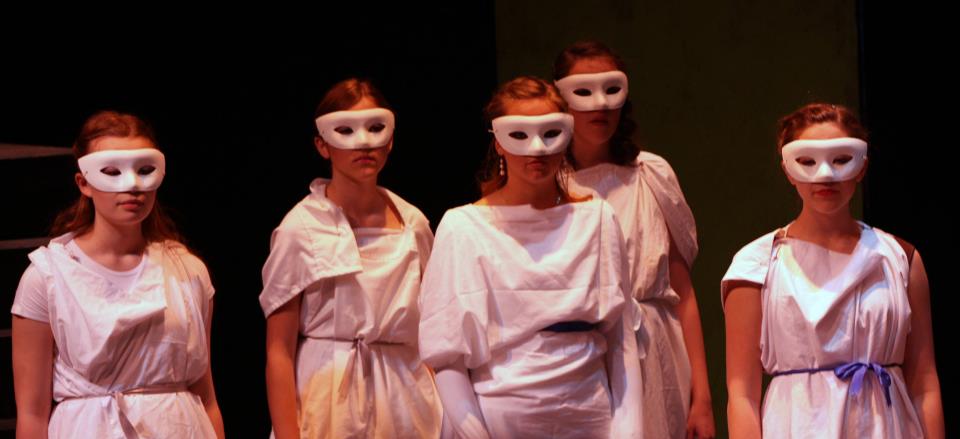
I'll undoubtedly post more about The Winter's Tale (including a certain LotR cross-over we worked on backstage...) but for now, here are some pictures and an enormous thank you and congratulations to everyone involved.


The End
~Carrots

Monday, January 30, 2012

Most Importantly...

Have fun with your hair! Add accesories, add accent braids, combine styles, but HAVE FUN. Here are some more ideas.
Modified Gibson with Marian Braid.

Marian Braid with Circlet.

And again...
Movies and TV shows are also great places to find inspiration--you'll often find that the styles are simpler to do yourself than you'd think. Some of my favorite shows to steal from (at least for this era) are Lord of the Rings, Robin Hood (the BBC show and everything else), Merlin (again BBC), Chronicles of Narnia, and Ever After. Here are still more pictures to get your thinkers going. And if you find something you'd like to do but can't figure out, bring a picture to rehearsal and we'll see what we can do!


Just plain historical is also good, surprisingly enough. One really fun one (instructions here) is Elizabethan Hair-Taping. Completely accurate, fun, functional, and pretty.

Remember, the most important thing is to have fun--and if you don't feel like a star, you're doing something wrong.

~Carrots

Modified Gibson Tuck

I almost didn't include this hairstyle, because I was stuck thinking of it as "Gibson Girl," which is, you know, entirely the wrong era. But then I wore it for one very long rehearsal, by the end it was mostly fallen out, and I realized that if you do it loosely it really fits the Elizabethan shape! It almost looks like you're wearing a snood. Plus, it's incredibly, deceivingly easy while looking fantastic.
Here's the lowdown: you need a circlet, but after that you're set. (This is my go-to hairstyle lately.) Leave all your hair down. Place your circlet on top of your head and twist the front sections under as in my Twisted Circlet hairstyle. Then you just tuck all your hair into the headband, use some bobby pins as necessary to tuck up strays, and voila! The trick to getting this more Medieval look rather than something more modern is to tuck the hair all the way around, rather than just in the back.
~Carrots

Simple Half-Up Hairstyles

So, as promised (although a little later than expected) here are the first how-to's for some easy Medieval (yes, medieval, but still Shakespearean enough) hairstyles. The styles featured below, due to their simplicity and versatility, are perfect for almost everyone: ladies, attendants, shepherdesses... the list goes on. For the play, I think for most of you girls it would be good to start with your hair mostly down, like this, and then put it up for the end where everyone is sixteen years older. These half-up hairstyles are also great for helping to hold caps in place!
A few general tips:
1. Use a middle part.
2. Go for your natural hair. Rather than curling or straightening it with an iron, just let it do its thing--this will look best with the hairstyles, and hey, it's easier, right? You could also do sock bun curls, because it's basically rag curling, and that's been around since Medieval times at least.
That's not my hair, by the way. I've never gotten a picture of mine with sock bun curls, but I know it works.
Now I promise, these are easy easy easy: if you can braid and use a bobby pin, you're good. Let's get to it!
Here (second style in the video) are full instructions if you can't figure it out from the picture--I did do it tighter so you could see the construction, though. If you poof it up a bit more in front instead of having it so tight it looks better.


On to hairstyle number two!
You know that scene in the Glittering Caves when Eowyn ties the front of her hair into a knot? Yeah. That's all there is to it. I do find that to keep my bangs in nicely some twisting is in order, and you might want to use a bobby pin or two if your hair won't stay on its own. Again the link is here (third style in video) if you want more detail.

You want another? Your wish is my command.
Girls, it does not get easier than this. Obviously, you do need a circlet, but once you've got that you just set it on top of your head, pull the front bit of your hair up, over, and beneath the front of the ring, and there you go. This is also the first step of my Modified Gibson Tuck.

But wait, there's more!

Also known as a "milkmaid braid," this style is, again, very simple as long as you can braid (which I'm assuming most of you can.) Full, detailed, and helpful instructions can be found here.

That's more a picture of Guy, isn't it? Oops.
Be back soon with more (and some up-do's...)
~Carrots

Saturday, January 28, 2012

How to Make a Doric Chiton

(Otherwise known as a "Girly Toga.") For all my lovely girls in the chorus.
You will need:
1 White Sheet--you could maybe get away with a twin size if you're really, really small, but queen size would probably be better
2 Large-ish safety pins or brooches

The picture above gives you a guide for folding, but just for clarity, here are written instructions.

1. Obtain a sheet. This is a very important step.
2. Fold the sheet down hamburger style until it is as long as the length between your shoulders and ankles. Depending on your height, this may be a only a foot or you may have to fold it in half.
3. Now, keeping the top folded down, fold the sheet in half hotdog style.
4. Hold the folded sheet up in front of you. Make a pretty face. Good? Ok, find where you want the shoulder straps to be (allow for a little draping around the neckline and make sure to leave room for your arm to get through on the folded side.)
5. Overlap the top edges and pin them together for the shoulder straps.

And that's it! We'll have ribbons for you at rehearsal, but if you want to go parade for your family, just tie a belt or sash around your waist, overlapping the open side first.
For the play, here's what you should have on underneath: White tights or leggings and a white cami or shirt. I'm perfectly fine with either, so if you don't want your arms naked go ahead and wear a shirt. I'd also recommend spankies, especially for while you're doing the storm. And don't forget your ballet slippers!

Break a leg, girlies.
For copyright purposes, the image was found here. I wrote the instructions all by myself, though.

Saturday, January 21, 2012

Duties

Assistant Director
Assistant Stage Manager
Costumer
Hair & Makeup Advisor
Choreographer
Consultant
Secretary
Dramaturg
Errand-girl
Props Master
Actress
Four hours in the prop/costume shop yesterday, then three hours of rehearsal. A few hours (so far) this weekend working on props.I should be getting paid for this.

And then of course there's:
Student
and, since my parents are were out of town for the week,
Mom

We spent the day cleaning the house top-to-bottom to prepare for the parents' and grandparents' homecoming. Here I am in my super-attractive "Clean ALL the things!" get-up.

 It's secretly a Rosie the Riveter costume.
Bedtime can't come too soon.